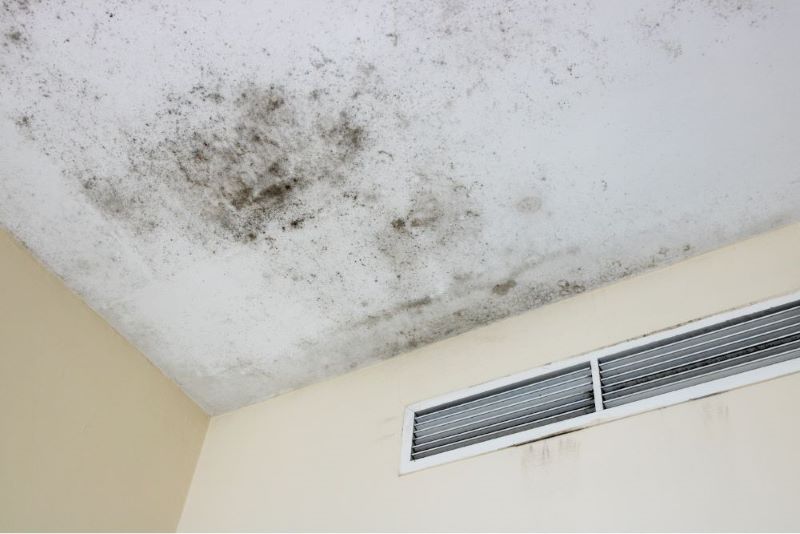
At some point, you’ll look up at the ceiling and see that there are black, white, brown, or sometimes green spots. What are those strange spots? These spots—likely mold spots—are not uncommon, particularly in moist, humid environments like your kitchen or bathroom. To prevent any damage to your house or health, it’s critical to remove mold as soon as possible.
Let’s walk you through the mold on ceiling remediation tips and guide.
Common Causes Of Mold On Ceiling
The development of mold on ceilings is caused by a wide variety of factors, such as warm temperatures, excessive moisture, and insufficient ventilation. Once mold has been removed, you can prevent it from growing again by being aware of these factors.
- Insufficient air circulation and insufficient ventilation in the kitchen or bathroom trap moisture, which is optimal for the growth of mold.
- High moisture levels can be triggered by spills, leaks, excessive dampness, and frequent baths or showers.
- Moist temperatures—which are typically produced by taking a shower or bath—are ideal for the growth of mold.
Health Risks Of Mold On Ceiling
Mold on ceilings, particularly black mold, can lead to several health problems, ranging from mild allergic reactions to serious lung diseases.
Common health problems consist of:
- Allergic reactions – skin rashes, runny nose, sneezing
- Asthma attacks
- Infections in the respiratory system
Mold On Ceiling Remediation Tips And Guide
If the mold growth is small and doable, you might consider cleaning it yourself with a spray bottle, some warm water, hydrogen peroxide, baking soda, or white vinegar. But if the mold growth is big and needs modernized tools, it’s time to get professional mold remediation help.
Here’s the step-by-step mold on ceiling remediation tips and guide:
Step #1 – Identify Mold Signs
Keep an eye out for any obvious signs of mold, musty odors, or discolored areas. If you identify the problem early on, you can take immediate action to prevent it from spreading.
Step #2 – Find A Sturdy Platform Or Ladder
You must prioritize safety first above all else. To get to the affected area, use a safe, sturdy platform or ladder. Be cautious about standing on chairs and other potentially dangerous surfaces.
Step #3 – Put On Safety Gear
If mold spores get on your skin or are inhaled, they can be dangerous. Put on proper safety gear, such as a face mask, goggles, and gloves, to protect yourself. By doing this, you’ll minimize your chance of exposure while remaining safe when the cleaning takes place.
#4 Make Use Of Effective Cleaning Solutions
Now is the right moment to clean the mold on your ceiling. You can use the following effective cleaning solutions to eliminate mold development throughout your home:
White Vinegar
Mold can be stopped from growing and prevented from spreading by using white vinegar. Also, because it doesn’t release any hazardous fumes when used, it is safe to use to get rid of mold and its spores.
Pour one cup of undiluted white vinegar into a spray bottle, top it off with one cup of warm water, twist on the spray bottle cap, and shake gently to combine everything.
Hydrogen Peroxide
Hydrogen peroxide works very well on porous surfaces, which are common environments for mold. Hydrogen peroxide’s effervescent nature helps it to seep deeply into porous materials, guaranteeing that mold is killed at its source.
Get a spray container large enough to fit the hydrogen peroxide solution, then fill it with at least 3% of the undiluted hydrogen peroxide.
Baking Soda
Through the disruption of the pH balance in the area that is affected, baking soda paste helps in the elimination of current mold spores and prevents their proliferation in the future. Aside from its abrasive properties, baking soda also helps to remove mold from surfaces.
Add 8 teaspoons of baking soda and a small amount of water to a clean container. Stir and gradually add additional water until the mixture becomes thick and paste-like. Ensure that the paste is lump-free.
Borax
Mold spores can be killed by borax by disrupting its pH levels.
Use a spray bottle to combine one cup of borax and water to remove mold. Spray the affected area, scrub off the mold, and then leave a layer of borax to prevent it from growing back. Borax can be used on porous surfaces after being boiled in hot water.
#5 Apply The Cleaning Solution
Apply the cleaning solution onto the affected area with a clean cloth or a spray bottle. Cover the entire surface that has been infested with mold. To ensure that the mold spores are killed, let the solution sit for a few minutes.
#6 Scrub The Mold
After making sure the cleaning solution has had enough time to do its job, use a non-abrasive sponge or a soft-bristled brush to gently scrub the mold. Take care not to damage the ceiling surface by being thorough but delicate. Continue scrubbing until all mold residue is gone, and remember to rinse the brush or sponge often.
#7 Let It Dry
Give the ceiling enough time to fully dry. The drying process can be helped by sufficient ventilation and air circulation. To increase ventilation, open the windows or use fans. Before moving on to the next step, it is important to make sure the ceiling is dry.
#8 Sand And Repaint
The affected area should be sanded and repainted to restore the beauty of your ceiling as well as prevent the future development of mold. After the mold destruction procedure, sanding will help smooth down any rough spots that linger. To guarantee lasting mold protection, use a premium mold-resistant paint.
How to Stop Ceiling Mold From Growing Back
It is equally essential to prevent mold growth on your ceiling as it is to get rid of it.
- To increase air circulation, open the windows or install a circulating fan.
- Maintain a cleaned shower and bathtub stall.
- Consider a dehumidifier in bathrooms without windows.
- When taking a bath or a shower, always make use of the bathroom fan to help lower the humidity levels.
- After every usage, wipe down the shower stall with a towel or squeegee.
- Wash bath rugs, towels, shower curtains, and liners regularly.
- Re-apply mold-resistant paint to kitchen or bathroom ceilings to prevent mold growth.
· Install ceiling cladding; unlike drywall or plaster ceilings, it is non-porous, so it won’t absorb moisture or steam and won’t encourage the development of mold.